Let's get started with Amazon Web Service(AWS-01)
In this blog, I am going to talk about what is AWS, how to communicate with AWS, and some details about AWS CLI.
What is Amazon Web Service
Amazon Web Service is abbreviated as AWS. An example for service will be a service of storage, a service of servers, a service for development in the browser like cloud9. These services are provided by Amazon, so it makes sense to have it in name. Web means that all the services are provided via internet. You should make HTTPS requests to get access to the services.
In this article we are going to make a brief introduction to the AWS and its tools such as AWS CLI, AWS SDK, AWS Cloud9 and so on.
How to communicate with AWS
There are four ways for you to get access to the services as shown in the figure below.
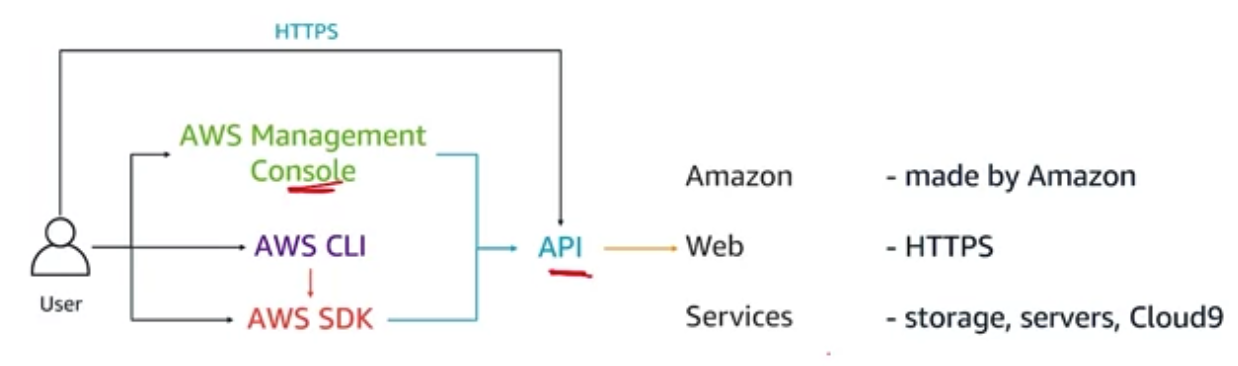
As we have described above, AWS provides its service via Internet and HTTPS requests. So the first way is to send HTTPS request directly to Amazon to control your service. But it is too complex and is not recommended. AWS management Console gives you an approach to do it in a graphical way. If you want to manage your services in batch, using AWS Command Line Interface which is short for AWS CLI will make things easier. To access services in the code, you should use AWS SDK, which interact with API through AWS CLI.
AWS toolkit for intellij
Step 2: Install SAM
Because I am using MacBook, I install it with brew.
Download AWS from github through “brew tap” command. Tap is an abbreviation of Third-Party Repositories. It is an option of brew to get repository from Github using HTTPS which allows you to install application from third-party. Since so many taps are hosted on Github, this command is a shortcut for brew tap user/repo https://github.com/`user`/homebrew-`repo`
1 | brew tap aws/tap |
Install it through brew install command.
1 | brew install aws-cli-sam |
Let's get started with Amazon Web Service(AWS-01)
http://blog.brimon.me/2022/08/17/AWS/Let-s-get-started-with-Amazon-Web-Service/